Sunday, August 4, 2013

Pineapple Layer Cake

pineapple-cake-7
http://www.ecurry.com/blog/desserts-sweets/pineapple-layer-cake/

pineapple-cake-4

Pineapple Layer Cake

Ingredients:
  1. 1.2  Cups (150 gms) All Purpose flour
  2. 2/3 Cup  (150 gms)  of Sugar
  3. 2 Tablespoon Corn Flour ( Called Corn Starch in some places)
  4. 4 Eggs – at room temperature (Yolks & Whites Separated)
  5. 1 Teaspoon Baking Powder
  6. 1 Teaspoon Vanilla Extract
  7. 1 Cup Pineapple Juice
  8. 1 Tablespoon Sugar
  9. 2 Cups Crushed Pineapple – Canned or Fresh (or more if you want more pineapples)
  10. 2  Cups Thinly Sliced Pineapples (for the layers & more to decorate)
For the Pineapple Cream:
  1. Whipping Cream – 500 ml – Chilled or 300 ml Heavy/Whipping/Double Cream (In carton)
  2. Icing Sugar – 4 Tablespoons
  3. 1 Teaspoon Pineapple Extract/Essence


Preparation:
Preheat oven to 350 Degree F.
Sift Flour, Corn flour(Corn Starch) & Baking powder  twice.
In a mixing bowl, beat the egg yolks & beat till frothy & fluffy. Combine 2 tablespoons of sugar & continue to mix till the mix is thicker. Add the Vanilla extract & beat till it almost doubles in amount.
In another bowl beat the egg white till bubbly. Gradually beat in sugar,  until thick and meringue-like & peaks form. This might take about 5-10 minutes.
Very gently fold in the egg yolks into the egg whites. Do not stir. Sift the flour, corn flour, baking powder mix into the egg mix.  Fold in the flour with a spatula or whisk to combine. Do not stir or move too much, so as not to let the air escape.
Lightly grease the Cake pan ( I used a 9″ Spring Foam).
Pour the mix carefully in the pan & put it in the oven.
Bake for 30 -35 minutes or till the toothpick comes out clean when inserted at the center of the cake.
Cool on a wire rack.
Divide the cake horizontally into 3 parts.
Combine the Pineapple Juice & 1 tablespoon of sugar.
(Optional: I do this every time, & I really do not know how I missed it this time… I slice off in very thin strips the brown on the top & the sides of the cake, not that it interferes with the taste, but looks way better than this did when the cake is layered & topped with the cream)
Place the bottom layer of the cake on the plate that you are going to serve. Spoon the pineapple juice on this layer of the cake till the cake is moist.


To Prepare the Cream:
If you are using liquid heavy/whipping/double cream; use chilled cream and whip/whisk cream in a chilled bowl until prominent peaks form. Keep cream chilled.
Chill 2 Bowls in the Fridge. Chill the Beater/Whisk.
Divide the prepared/prepackaged Whipping Cream in 2 Bowls. Add 2 Tablespoons of Sugar to each bowl along with the Cream. Put one bowl back in the Fridge to Chill.
Add half the amount of the Pineapple Extract to the bowl if you are using the extract. Beat the Whipping Cream, & the Sugar in one bowl till the cream is thick,  fluffy & forms peaks. Fold in the  the Crushed Pineapples with this Cream.


To Assemble the Cake:
Spread the Pineapple Cream mix  on this bottom part of the cake in a layer.

pineapple-cake-collage
Spread more pineapple slices over the Cream. Put the other part of the cake on this and repeat the same steps from soaking the cake to layering the pineapple slices.
Now put the Third & the Final Layer of the Cake on the second layer of Cream & pineapple slices  & repeat the same process of soaking the cake with the juice.
Take out the other bowl of Cream from the refrigerator. Add the rest of the pineapple extract & beat the Cream & the Sugar together till Fluffy & Peaks form. Top the final layer & the sides of the cake with this cream. Top the Cream with more pineapple slices.
(For myself, I do not usually apply the cream on the sides most of the time, or do a very thin layer. It is a personal choice)
Put the cake in the refrigerator and chill for 3-4 hours. Serve chilled.
Note: If you do not want to make the sponge cake at home, the store bought Angel Cake Mix works as a really good substitute for this. I have done it sometimes, & wasn’t disappointed with the outcome.

Snickerdoodle

 snickerdoodle
Yield: 16-18 cookies
Ingredients
  • 1/2 cup butter (1 stick), softened
  • 1/2 cup granulated sugar
  • 1/3 cup brown sugar
  • 1 egg
  • 1/2 teaspoon vanilla
  • 1 1/2 cups flour
  • 1/4 teaspoon salt
  • 1/2 teaspoon baking soda
  • 1/4 teaspoon cream of tartar
  • For rolling:
  • 2 tablespoons granulated sugar
  • 1 teaspoon cinnamon
Directions
  1. In a large bowl, cream together the butter and sugars with an electric mixer on high speed. Add the egg and vanilla and beat until smooth.
  2. In another bowl, combine the flour, salt, baking soda, and cream of tartar.
  3. Pour the dry ingredients into the wet ingredients and mix well.
  4. Preheat oven to 300 degrees while you let the dough rest for 30 to 60 minutes in the refrigerator.
  5. In a small bowl, combine the sugar with the cinnamon for the topping.
  6. Take about 2 1/2 tablespoons of the dough and roll it into a ball. Roll this dough in the cinnamon/sugar mixture and press it onto an ungreased cookie sheet. Repeat for the remaining cookies.
  7. Bake the cookies for 12 to 14 minutes and no more. The cookies may seem undercooked, but will continue to develop after they are removed from the oven. When the cookies have cooled they should be soft and chewy in the middle.
  8. http://lovintheoven.com/2010/03/even-better-snickerdoodle.html

Chocolate Cake Mix Recipe


181 Calorie Chocolate Muffins (a Hungry Girl recipe) - ButterYum

Homemade Chocolate Cake Mix
makes the equivalent of one 18.25-ounce box

2 cups all-purpose flour
1 3/4 cups granulated sugar
1 cup Dutch-processed cocoa powder (sifted to remove lumps)
1/4 cup shortening
2 teaspoons baking powder
1 teaspoon baking soda
1 teaspoon fine sea salt

Place all ingredients in the bowl of a stand mixer and mix on low speed until the mixture resembles a box of cake mix.  Alternately, you can process the ingredients in a food processor.

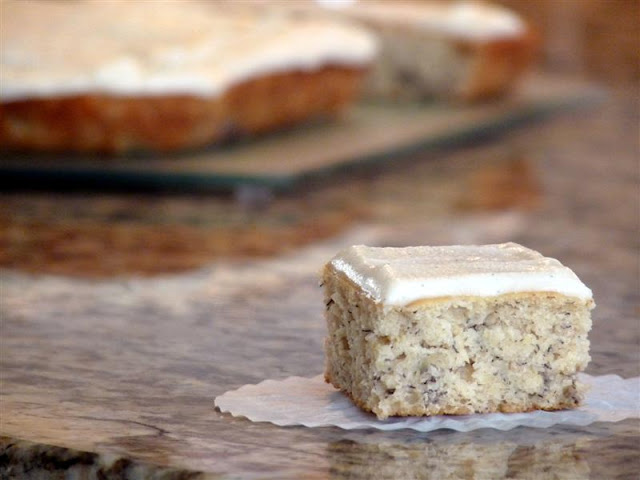
Banana Cake Vanilla Bean Frosting


Banana Cake with Vanilla Bean Frosting

makes one 8x8-inch pan (double recipe for a 9x13 pan)

Cake:
2/3 cup sugar
1/2 cup sour cream
1 egg
2 tablespoons unsalted butter, softened
2 mashed super ripe bananas (about 3/4 cup)
1 teaspoon pure vanilla extract 
1 cup flour
1/4 teaspoon salt
1/2 teaspoon baking soda

Frosting:
2 tablespoons unsalted butter, softened
1/4 cup heavy cream
1/2 teaspoon vanilla bean paste* (see below)
1 1/4 cups confectioner's sugar

To make cake (easily mixed by hand):
Preheat the oven to 375F (see note below).  Cream together sugar, sour cream, egg, and 2 tablespoons softened butter.  Add mashed bananas and 1 teaspoon vanilla extract.  Add flour, salt, and baking soda; mix well.  Pour into greased 8x8 pan.  Bake at 375F for 20-25 minutes until a toothpick inserted in the center comes out clean.  Cool completely before frosting.

To make frosting:
Cream butter and confectioner's sugar together until smooth.  Slowly add the heavy cream; stir until smooth.  Stir in the vanilla bean paste until fully incorporated.  Spread on cooled cake. 

Note - Bake at 350F if using a glass pan.
Recipe doubles well to fit in a 9x13 pan.   

*Here's the general rule for substituting vanilla:
1 vanilla bean =
1 tablespoon vanilla powder =
1 tablespoon vanilla bean paste =
1 tablespoon pure vanilla extract

Veggie Lasagna Roll Ups


Veggie Lasagna Roll Ups
Yield: 8 servings
Ingredients
  • 8 lasagna noodles, uncooked
  • 14 oz freshly shredded, low-moisture part skim Mozzarella cheese, divided
  • 3/4 cup Ricotta cheese
  • 1 large egg white
  • 1/3 cup freshly, finely shredded Parmesan cheese (about 1 1/4 oz)
  • freshly ground black pepper
  • 3 - 4 medium Roma tomatoes, thinly sliced (about 1/6 inch thick slices)
  • 1/4 cup chopped fresh basil, plus more for garnish
  • 1 cup marinara sauce, recipe follows
  • Simple Marinara Sauce
  • 2 Tbsp extra virgin olive oil
  • 1/4 cup finely chopped yellow onion
  • 2 cloves garlic finely minced
  • 1 (28 oz) can crushed tomatoes
  • salt and freshly ground black pepper to taste
Directions
  • Preheat oven to 350 degrees. Cook pasta according to directions listed on package to al dente. Drain pasta (DO NOT rinse with water) and align lasagna noodles in a single layer on a large sheet of parchment or wax paper.
  • For filling, in a large mixing bowl, whisk together ricotta cheese and egg white until well blended. Stir in Parmesan cheese. Mix in 12 oz. of the Mozzarella cheese and season with black pepper to taste (I wouldn't recommend seasoning with salt just because the cheeses already have plenty of salt).
  • Place 1/4 cup of the cheese mixture over each lasagna noodle and spread into an even layer, going from one end of the lasagna to the other. Align 4 thin tomato slices over cheese mixture then sprinkle fresh basil over top. Snugly roll lasagna noodles to opposite end. Spread about 1/4 cup pasta sauce in the bottom of an 11 x 7 inch baking dish. Align lasagna roll ups, seam side down in dish. Top each roll up with about 2 Tbsp of the pasta sauce (covering edges of pasta so they don't dry out while baking). Sprinkle top with remaining 2 oz. shredded Mozzarella. Bake in preheated oven 30 minutes. Remove from oven, plate pasta and garnish with plenty of basil ribbons. Serve warm.
  • Simple Marinara Sauce
  • Heat olive oil in a medium saucepan over medium high heat. Add onions to hot oil and saute about 3 minutes until soft, adding garlic during last minute of sauteing. Pour in crushed tomatoes and season with salt and pepper to taste. Bring mixture just to a boil, then reduce heat to a simmer and allow sauce to cook for about 25 - 30 minutes (which will allow some of the water in crushed tomatoes to evaporate) while you prepare pasta and lasagna filling (you can freeze or refrigerate left over sauce in a small airtight container for later use, adding fresh basil if desired).
  • Recipe Source: Cooking Classyhttp://www.cookingclassy.com/2012/10/caprese-lasagna-roll-ups/

Saturday, August 3, 2013

Apple Pie Filling

You’re going to ask me for those labels, aren’t you?  I’ll get on that.  One day.  Before Christmas.  Maybe.
*A note about thickeners:   #1 rule of canning is to not make substitutions or changes to a recipe that has been tested for canning.  I noticed a lot of older recipes call for corn starch, which is not recommended by the USDA for safe canning.  Then I found lots of recipes calling for ClearJel, but I couldn’t find ClearJel anywhere.  I finally got a hold of someone at my local extension service (I seriously love those people!) and she explained that the only products that have been verified after testing are Ultra Gel and Thick Gel.  Ultra Gel is just a modified corn starch that’s safe and effective for use in canning (as well as tons of other things).  She said ClearJel is the same thing as Ultra Gel, it’s just changed names.  I found Ultra Gel in several local canning supply stores, so if you find a well stocked location you should be able to easily find it.  You should also be able to find it at cooking stores.  If not, then you can order it on-line, but that’s what you should be using.  It’s not the same thing as the little boxes of “Sure-Gel” you get to make jam.  If you are a Boise/Meridian local, I bought mine at Karcher Ranch Market in Nampa.  And I’ve been told in Utah it’s at Orson Gygi.  I hope that’s helpful to someone else since it took me a while to figure out!
So in order to make this yummy filling, you’ll need a bunch of apples; obviously.  Make sure they are crisp, and tart works best- like Granny Smiths, but really any crisp apple is just fine.  Feel free to use a mix!
You can use an apple-corer-slicer-thingy (which by the way always reminds me of a medieval torture device.  Not that I am in any way an expert in medieval torture devices)  or do them by hand.  If you’re not doing a huge batch, it really doesn’t take too long to peel them.  To keep your apples looking purdy, toss them into a bowl as you cut filled with either water with lemon juice or water with ascorbic acid (which sounds like a not-so-medieval torture device…)  Just a note- you’ll want to slice more apples than you think you need because they reduce a bit when blanched and you’ll measure them after blanching.
When they’re all sliced up, you’ll give them a douse in boiling water; only about a minute will do it.
Remove the apples from the pot and set them in a big strainer if you have one and just cover to keep warm.  I use one of these pasta pots that has a strainer that fits inside; it works perfectly.
Now for the sweet, sticky, full-of-fall deliciousness.  Mix your sugar, Ultra Gel, and spices, in a large sauce pot.
Whisk them together with some apple juice and some water,
And heat it until it’s thick and bubbly.  The Ultra Gel works so fast that by the time the sauce simmers, it should be about done.
As soon as your sauce is hot and bubbly, add the apples back in
and stir them until they’re heated through again.  Man I wish you all had smell-o-screens.  Someone needs to invent that.  This will smell so so good.
Use a funnel to ladle the hot mixture into your clean jars
Make sure you get every last drop of the ooey gooey syrup
Pie.  In a Jar.
Slowly move your spatula around in the jar to remove air bubbles and make sure you have one inchof headspace (the amount of space from the top of your filling to the top of your jar).  Wipe off the jar rim so it’s nice and clean and then place your jar lids on top.  Remember, your lids should have been soaking in simmering water, and your jars should be clean and warm.
Secure with the bands and process in a water bath for the time allotted.  Let cool completely at room temperature.
So fun.
A quart jar should be enough to fill one standard pie.  Just dump in a pie crust and you’re good to go!  As I mentioned it’s also really yummy over pancakes, waffles and ice cream. You can fill crescent or puff pastry dough and make apple turnovers, or do as I did below and have an apple crisp made in the time it takes to whip up a quick crumb topping (I just used have of the crumb mixture from this Crumb-Topped Apple Pie recipe).  There’s really no wrong way to eat a jar of apple pie filling.  Unless you don’t eat it at all; that would be wrong.  As noted in the comments- you can even put the pie filling in a pie crust and put the entire un-baked pie into your freezer and have ready-to-go fresh pies stocked up!
I love it when recipes are scaled way down- you could even try this out and just do one jar if you’re new and canning is intimidating.  Or two jars if you find yourself ready to can a huge batch at 10pm only to realize you only have 2 jars left.  Me? Never.
Handy chart from the National Center for Food Preservation

Friday, August 2, 2013

Banana Butterfinger Pudding Recipe

bn1
http://www.sugarplumblog.net/2013/05/butterfinger-banana-pudding_23.html


Butterfinger Banana Pudding

Ingredients: 
1 can sweetened condensed milk 
1 cup milk 
2 tablespoons cornstarch 
3 large eggs, beaten 
2 teaspoons vanilla extract 
1 tub Cool Whip 
1 box Nilla Wafers 
4 bananas, peeled, sliced 
1 Butterfinger, crushed

Directions: 
Whisk together sweetened condensed milk, milk and cornstarch in a small saucepan.  Cook and whisk over medium heat, until mixture comes to a full boil.  Turn off heat and whisk in eggs until combined.  Strain pudding into a large bowl, whisk in vanilla until combined.  Chill bowl over an ice bath or in the refrigerator/freezer until cold.  When cold, fold in Cool Whip until combined.

Layer wafers, bananas in pudding in a glass bowl.  I used all of my pudding and bananas, but had leftover wafers.  Top pudding with additional Cool Whip, if desired; sprinkle with Butterfinger.  Chill until cold.

Makes 8-10 servings
http://www.sugarplumblog.net/2013/05/butterfinger-banana-pudding_23.html