Showing posts with label Garden. Show all posts

Friday, August 16, 2013

DIY Garden Soil Testing


Photo: A Simple Do It Yourself Soil Test

Perform your soil test by placing a sample into two separate cups or containers. Add vinegar to one. If it fizzes your soil is alkaline. If not, add some water to the second cup and stir. Add baking soda. If it fizzes you have acidic soil. If neither have a reaction your soil is somewhat pH balanced.

GARDEN SOIL TESTING ON YOUR OWN


Garden in a Condo Patio


photos property of  homemadeiseasy blogger. DO NOT COPY


Metal to pull in the electric from the air.....makes plants stronger, healthy and produce more.

This patio garden summer 2011 just kept growing & producing.


photos property of homemadeiseasy blogger. DO NOT COPY


Winter. We had cats that went over our fence. SO down went the tarp.
 We took tarp off first day in April and had volunteers already growing.

That would be my handsome hubby helping me with tarp and wire over tarp.
We have since moved from here and this year I tried my hand at a potted garden.
IT'S wonderful but next summer I will do ground and potted garden.


WEEDS

I don't use anything in my garden that's not organic. I value my family and their health!
I use newspaper, but ONLY the pages with black ink. Colored ink is a NO NO for your garden.
I use organic weed killer that I make myself.

I'm happy and willing to share. Just contact me on FB or here on my blog for info you want me to post.


HomeMadeEasy ~ Virginia~

Wednesday, August 7, 2013

Plant In The Soil Bag


Here’s a neat little trick I found while reading through Farmers Almanac. The article was written by Jane Baumgartner

The herbs recommended are basil, chives, marjoram, oregano, parsley, sage, or thyme.

Here are the easy steps to get your herbs growing: Herbs in a Bag!
  1. Lay the bag of soil flat on the ground.
  2. Poke a few drainage holes in the top surface.
  3. Roll the bag over, then cut a few holes in the new top surface.
  4. Insert herb seedlings into the holes and firm the soil around the roots.
  5. Water and fertilize as you would a regular garden bed.
  6. Set the bed into a wheelbarrow or child’s wagon and move it into and out of the sunlight as needed.
Now, with time, regular watering and fertilizing, and some spring sunshine, you can look forward to harvesting herbs from this couldn't-be-easier garden!
 
Thank you for sharing Jane.

Friday, July 5, 2013

Soaker-Hose You Make At Home


 Using a drill and a small bit, drill holes into the hose. 

Lay in the garden and cover with mulch. 

When you turn on the water, it will distribute 
the water evenly around the plants.

http://gardening.sheknows.com/2011/06/30/diy-soaker-hose/

Plastic Jug To Watering Can


Learn how to do it on A Journey To A Dream.

Upcycle Bottle to Sprinkler On Wheels


Upcycle Bottle Sprinkler on wheels....... and there you go. 
Garden sprinkler on the go!

Sunday, June 9, 2013

Strawberry Plants

Strawberry Plants & Freezing thumbnail

http://www.ehow.com/facts_5832466_strawberry-plants-freezing.html


Establish Your Plants

  • Be sure you have planted or transplanted your strawberry plants to give them enough time to establish a strong root system before frost and freezing arrives. Late summer or early fall are ideal times for planting or transplanting strawberry plants.

Location of your Strawberry Plants

  • Because strawberry blossoms are sensitive to frost and freezing, it is important to plant strawberries away from shallow or low-lying spots, where frost may occur.
  • As winter approaches and your strawberry plants stop producing fruit, prune off runners and late blossoms from the plants. By doing this, you are channeling the nutritional energy of your strawberry plants to the plant itself which strengthens it for winter.

Over the Winter

  • Before the first hard freeze in fall, cover your strawberry plants with a thick layer of at least four inches of mulch or clean straw. This will keep your strawberry plant roots protected from the cold by keeping the soil underneath the straw from freezing.

In the Spring

  • In the spring, as soon as the threat of frost has past and new leaves develop, remove the mulch or straw from your strawberry plants. Keep the mulch or straw close by to the plants in case an unexpected late frost should come so you can quickly cover your plants for blossom protection.


Read more: Strawberry Plants & Freezing | eHow http://www.ehow.com/facts_5832466_strawberry-plants-freezing.html#ixzz2Vhia52Mf

Gophers, Moles or Voles in your raised bed garden!

Lining with Chicken Wire
http://www.growgardentomatoes.com/constructing-raised-bed-gardens.html

Line your raised bed with chicken wire to keep out 

gophers and moles!

http://www.growgardentomatoes.com/constructing-raised-bed-gardens.html
FULL ARTICLE HERE, PHOTO AND ARTICLE CREDIT WEB PAGE FOR YOU.

Build a 12-inch high raised bed over taller beds to save on cost, though a 24-inch bed would be even handier for gardening while standing. With 12-inches of soil mix you don't necessarily have to dig out the soil underneath the bed, unless you're planning on planting root vegetables such as carrots or potatoes, and you want a little more depth of tilled soil.
Constructing Raised Bed Gardens

Plans for building raised beds 4x8x1 feet in size

Materials when Using 2x6 Boards
4-in. x 4-in. post - 6ft1 each
2-in. x 6-in. boards - 8 ft6 each


Required Hardware
31/2-in. #14 wood screws24 each
4-ft x 10-ft roll of hardware cloth (metal 1/2-in. mesh) or chicken wire1 roll
3/4-in. rigid white PVC pipe - 10 ft1 each
1/2-in. flexible white PVC pipe - 10 ft3 each
3/4-in. pipe straps12 each
3/4-in. #8 wood screws24 each

Tools Required

  • Hammer
  • Electric drill
  • Level
  • Power saw (mitre or circular saw)

Note: If kit assembly is more to your liking then building a multi-level raised bed garden has never been easier with a 4 x 8 Raised bed kitfrom well-known Burpee Seed Company. It can be purchased with or without sanded kiln-dried Maine white cedar lumber and includes six coated aluminum pivoting corners for multiple design flexibility.
Burpee Raised Bed Kit

Constructing Raised Bed Gardens Step-by-Step

1. Cut to Length

Cutting to Length
Cut the boards and corner posts
  • Cut the 4x4 post into four 12-in corner posts
  • Cut two of the 2x6 boards into four 4-ft lengths
Cutting the PVC Pipe for Hoops
Cutting to Length
  • Cut the 3/4-in rigid PVC pipe for the base into six 12-in-long pieces.
  • Cut the 1/2-in flexible PVC pipe to 8-ft lengths.

2. Assemble the Planks

Drilling holes
  • Assemble the boards on a hard, flat surface
  • Pre-drill three holes slightly smaller than the screw several inches apart.
  • Set a 4-foot 2x6 on its edge, and place a 12-inch post at one end.
  • Hold in place with 12-in bar clamps.
  • Secure the board against the post with three 31/2-inch screws. Repeat at the other end of the board. Repeat with the other short board.
  • Join the short sides with the 8-foot boards, overlapping the ends of the other boards; pre-drill and attach with three screws at each end.
  • Add the other 8-foot long side.
  • Add the second row of 2x6s.
Securing the boardAdding the second row

3. Prepare the Site

Removing grass
  • Mark off the 4x8 site with stakes and string.
  • Remove any lawn grass or weeds (optionally you can just cover the ground with weed-control cloth).
  • Loosen the soil and remove any remaining weed roots.
  • If your site isn't level, dig out the high edges of the space to prepare for the placement of the frame.

4. Move the frame into place and level

Leveling sides
  • Move the bed into position in the yard.
  • Place a level on each side and dig out under the sides until all four sides are level.

5. Attach Pipe

Attaching Pipe
  • To hold hoops for bird netting or row covers, attach the six 12-inch pieces of 3/4-inch PVC pipe inside the bed.
  • On the long sides, space pipes 2 feet apart, 1 foot from each end and one in the center; screw on two tube straps to secure each pipe.

6. (Optional) Install Bottom Lining

Lining with Chicken Wire
  • Rake the existing soil at the bottom of the bed to level it, then tamp it smooth.
  • Line the bed with hardware cloth or chicken wire to keep out gophers and moles; trim the cloth with shears to fit around corner posts then tack in place with staples or bent nails.

7. Fill with Soil Mix

Filling the raised bed with soil
  • Fill the bed with good soil for tomatoes
  • Fill within 1 to 2-inches of the top
  • Rake smooth, breaking up any clumps
  • Let the bed settle for a few days before planting


Congratulations on building a raised bed! 

Terracotta Clay Pots for Watering In HOT DRY Location

ollabed-2

http://www.resilientcommunities.com/the-most-efficient-irrigation-system-in-the-world/?fb_action_ids=636979116330079&fb_action_types=og.likes&fb_source=other_multiline


The Most Efficient Irrigation System in the World

by JOHN ROBB on JUNE 8, 2013
If you live in a hot and dry location and you want to grow a garden, or keep a potted plant on your balcony, you have a problem.
It’s very hard to keep your plants properly watered.
I might have a resilient solution for you. It’s a simple, low-cost technology that works for you, around the clock.
Specifically, it’s an ancient bit of technology from Northern Africa/China that may be the most efficient irrigation system in the world. It has the capacity to:
  • Use 50-70% less water (which makes it a nice compliment to a rainwater harvesting system).
  • Control soil moisture levels to prevent over-watering and reduce irrigation labor.
  • Allow planting by seed. Reduce weed cover (by depriving surface rooting plants of water).
  • And much more…
What is it?
It’s simply a clay pot called an Olla (pronounced oy-yah). This clay pot is buried in the soil next to the plants you want to irrigate as you can see at the center of this photo (viaDripping Springs).
olla irrigaion
To irrigate, you simply add water to the pot. The pot then slowly releases the water to the plant over time.
Very simple.
The Olla
Here’s what an Olla looks like:
olla
It’s a terracotta clay pot that is:
  • Unglazed (you can glaze the neck and lip).
  • Fatter at the bottom than at the top.
  • Open at the top (typically with a lip to make filling it easier).
To put it to use, bury the pot next to the plants you want to water and cap it with a fitted cap or a stone to prevent mosquitoes from using it.
After that, just keep it filled.
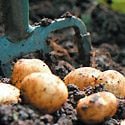
Photo of Ollas that are about to be buried.
ollabed-2
The technology employed by the Olla is pretty simple.
The unglazed clay of the pot only releases water upon demand, when it senses negative pressure (suction). It doesn't just seep out continuously. This negative pressure is caused by plants. When plant roots use the water, removing it from the soil, negative pressure is created. The interaction between the plant and the pot is what makes it so efficient.
Well, I’m back on the hunt to find great insight/experts for this month’s report.
Sincerely,  JOHN ROBB
JR
PS: If you know somebody that might benefit from this idea, please share it with them!

Thursday, May 30, 2013

Thwart Caterpillars - How To Kill Them.


Sprinkle Baking Soda on Cabbages (and other Brassicas) to Thwart Caterpillars If those small green cabbage worms have been making Swiss cheese of your cabbage, broccoli, and kale plants, try this trick: Make a 50/50 combination of flour and baking soda, and dust it all over whichever plants the cabbage worms are eating. They'll eat the combo while munching the leaves, and die within a day or so. Repeat as necessary.. THE UNINTENTIONAL URBAN FARMER.~ ALL TEXT AND PHOTO CREDITS.

Plant Tower Basics


--Plant Tower Basics--


The Plant Tower is a vertical garden built from four main ingredients. Please know that there is no strict formula or specific materials that you must use to build your tower. I would really encourage everyone to experiment and use what they have available. That being said we build our towers along these lines...

The Exoskeleton/ Frame-
Wire Fencing- 4' tall and 7' in circumference with a 2" by 4" grid spacing. Nylon Deer/ Bird netting is laid and tied on to fencing, fencing is then wrapped into a cylinder with netting on inside.

Straw Shell- A thin layer of straw between frame and soil.
To contain soil, reduce evaporation, and shelter soil from the elements.

The Soil- We use a medley of good garden soil, mixed with compost, and bark chips that will retain moisture and break down slowly.

The Watering Tube- Roughly 2' of 3" Perforated Drain Pipe aka Perf Pipe. Comes pre-perforated with lots of little slits. The tube extends from the top halfway down into the center of the tower. This allows water to penetrate deep into the core of the tower without having to flood the top.

Holes are cut in the side of tower and plant starts are transplanted into the side of the tower.

A full DIY tutorial will be coming soon with details for each ingredient and step of the process.

-TOWER POWER!


Steel fencing-4ft/1.2m tall and at least 7 ft/ 2.13m long. 2’’x4” grid spacing works well. 

3” Perforated Pipe, aka black drain pipe. The tube should be cut to half the height of the tower. 
You can find this pre-perforated at most hardware stores.


The Plant Tower "exoskeleton", made of a cylinder of 2"x 4" grid fencing,
wrapped a finer nylon deer/ bird netting


The first step is layering the straw around the inside edge of the tower. 
Soil is then added, another ring of straw, more soil, another retaining ring of straw, more soil, etc...


The top of this tower with some root crops like radish. Notice the irrigation tube poking up.


ALL PHOTOS AND TEXT CREDIT TO: PLANT TOWERS .....GREAT.

Tuesday, May 28, 2013

Invisible Trellis


Martha Stewart Living, March 2002


Vines appear to defy gravity -- and let your wall show through -- when they climb without supportive woodwork. Eye Hooks screwed into siding or walls and networks of medium-gauge wire hold delicate vines. (Heavier climbers, such as roses, will need heavy-gauge wire.) Design a grid by placing eye hooks 12 to 16 inches apart and running wire through them. Or you can follow one of our designs, placing eye hooks at intersections. Support wires across a large expanse with hooks every 2 feet. To install eye hooks in a brick or another masonry surface, use a masonry drill.


Tuesday, May 14, 2013