Showing posts with label Sewing EASY Projects. Show all posts

Friday, August 16, 2013

Cool Collars DIY Sewing EASY

collar after soaking


Things You'll Need


  • Cotton fabric- tan or lite colors  don't attract heat & no bright colors that attract bugs!
  • Tape measure
  • Shears
About 10 g Polymer water crystals


.* These are also sold as water absorbing crystals, crystal mud, crystal soil... You get the idea.dry and water soaked crystals 
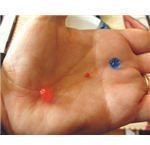
They are made of Polyacrylate. Sometimes you can find them at garden shops. Otherwise, they can be found on eBay from numerous sellers.**


Instructions


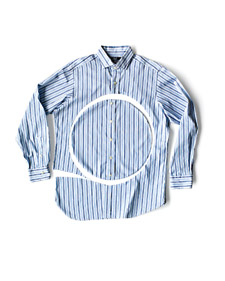
~Cut the fabric into a rectangle 45 inches long and 4 1/2 inches wide.

~Fold the fabric in half, so you have a doubled-over section of fabric 45 inches long and 2 1/4 inches wide.

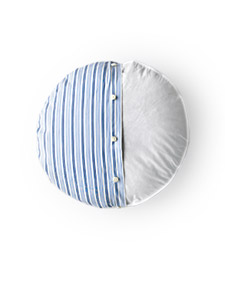
~Sew along the long side of the tube to secure the fabric into a tube shape.


  • ~Turn the tube inside out, so the seams are facing in.
  • ~Adjust the seam line so it is centered along the portion facing up, as opposed to on the edge of the tube, and iron over the tube.
  • ~Sew a seam across the tube's midsection, dividing it into two sections, each 22 1/2 inches long.
  • ~Pour 1/8 teaspoon of crystals into each half tube.
  • ~Seam across both tubes, 4-1/2 inches from the center seam, enclosing all of the crystals in each half within the corresponding pocket formed.
  • ~Repeat for a second pocket on each side of center, pouring 1/8 teaspoons of crystals into each, then sewing 4-1/2 inches from the prior seams.
  • ~Sew each end of fabric shut individually, leaving you with two sections, each approximately 14 inches long, without crystals inside.
  • ~Soak the collar for 1 hour in cold water to activate the gel.
  • ~Tie around your neck using the ends with no gel inside.
  • Tips & Warnings

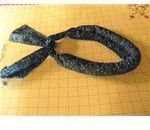
    • Soak your collar in cold water for three minutes to reactivate it. 
      Lay your collar out to dry at room temperature after use. 
      The collar can also be used for heating by microwaving for a short period until warm.
       Heat times will vary by microwave. Caution when you microwave this item!!!!!!!!

    http://www.brighthub.com/environment/green-living/articles/120758.aspx

    Read more: How to Make a Cool Collar | eHow http://www.ehow.com/how_8691066_make-cool-collar.html#ixzz2WVQiCz2q

    Wednesday, August 7, 2013

    Grandma's House Sleepover Pillowcase Bag

    DIY sleepover pillowcase bag

    DIY sleepover pillowcase bag

    DIY sleepover pillowcase bag


    how to create a DIY sleepover pillowcase bag

    GRANDMA'S HOUSE

    FAMILY REUNION BAG

    what you’ll need

    • 2 pillowcases
    • 2 sheets of felt (solid or pattern optional)
    • additional felt for embellishing pocket flap
    • 2 yards polypropylene webbing for straps
    • sewing machine
    • thread
    • sewing needle
    • sewing pins
    • hot glue gun and glue

    let’s do it

    • determine size of felt pocket and flap
    • trim as desired and pin to right side of one pillowcase
      TIP: it’s a little tricky to sew the pocket on since it’s a pillowcase. slowly walk it around as you sew, making sure you don’t sew the case together
    • attach embellishments with a needle and thread or hot glue
    • put both pillowcases together so finished sides face each other (i.e. openings are the same direction)
    • pin in place
    • sew 3 sides to create bag
      1. sew opposite end of pillowcase openings on short side
      2. continue along bottom, stop and reposition to sew flap
      3. sew 2 inner flaps of pillowcase opening together so there are 2 pockets to insert pillow and blanket
        TIP: you are sewing this inside out and will reverse it once you’ve finished sewing so don’t worry about perfect seams
    • turn inside out so finished felt pocket is facing outward
    • position, pin and sew both polypropylene webbing straps in desired location and comfortable length
    • let the packing begin!

    Pillowcase Shopping Bag Instructions

    pillowcase-shopping-bag-cherylstyle-

    pillowcase shopping bag instructions

    what you’ll need

    • 1 pillowcase
    • natural cotton batting (enough to line inside of pillowcase)
    • 1 sheet colored felt (for exterior pockets)
    • 1 1/2 yards (approximately) polypropylene webbing for shoulder straps/handles (available at most craft stores)
    • sewing machine
    • thread
    • sewing pins
    • scissors

    let’s do it

    • cut piece of natural cotton batting to fit the inside of pillowcase
    TIP: the batting may need to be a smidge smaller than the pillowcase to fit
    • wiggle batting in so it lays flat
    • pin in place
    • sew along all 4 sides to secure batting, about 1/8”–1/4” from edge
    • fold pillowcase in half
    • pin both sides to secure
    • sew each side to create bag
    • fold bag inside out (hem just sewn is now on inside)
    • cut colored sheet of felt in half (two 6”x9” pieces)
    • place one felt piece vertically and other on top of first piece
    • position felt pockets on one side of pillowcase
    • pin and sew to secure pocket
    TIP: sew slowly so you don’t sew through the other side of your bag, walk it around and let your hands guide you
    TIP: you can sew the pocket onto the bag before you sew the sides together, whichever is easier for you. Just be certain to put the pocket in the right place since you’ll be folding your pillowcase in half.
    • cut 2 polypropylene webbing straps to desired lengths
    • pin and sew in desired locations

    Tuesday, May 7, 2013

    Eco Shopping Bag Directions


    MarthaStewart.com photo credit.


    Take a recycled pillowcase bag OR shirt to the store or farmers' market and cut down on plastic.

    FROM:   Body+Soul, October 2008

    Directions
    1. With pillowcase inside out, stitch the open end closed.
    2. Cut off bottom third of case (which will be your strap).
    3. From the strap, cut off 1/2 inch of one side and the bottom and discard.
    4. Holding the open side of the bag, fold over the fabric 4 inches, making sure to turn under the raw (or cut) edge. Press and hem (be careful not to stitch through or you will seal the bag closed).
    5. With two hands, hold the bag on both sides, pull out, and lay flat. (You will have a triangle on each side.)

    6. Sew along the base of each triangle (about 3 inches below the corner).
    7. Grab the strap piece. Unfold it with the seam facing out, so you have one long strip. Fold over the top and bottom edges about an inch and press. Fold the top and bottom edges again so they meet in the center and press. Stitch each side down the center.
    8. To connect the strap to the bag, fold under the raw edges of the strap 1/4 inch. Match one edge of the strap to the seam of the bag and stitch in a square. Sew other end of strap to the bag the same way. Turn the bag inside out and enjoy!


    COMMENTS FROM MARTHA WEB READERS:


  •                  msp_123
    21 Jul, 2012 Great article! It's also important to use cloth sandwich/snack bags. My favorite brand:
    http://www.alloit.com/search?search=lunch&x=0&y=0

  • sawitri
    19 Jul, 2011 Thanks for the inspiration! I got a little bit confused after step 5, so I made the bags a slightly different way, using the hem of the pillowcase as the straps http://sewtoronto.blogspot.com/2011/06/simple-recycled-pillowcase-tote-b...

  • jeanneduncan
    9 Sep, 2010 I have made about six of these, with a slight variation: I make an identical lining out of a second pillowcase, usually one that contrasts (or just white). This makes the bag stronger and more substantial, and it's also more elegant. There isn't room here to provide instructions, but following directions for any lined bag works (in place of step 4).
  • Shirt Throw Pillows


    http://www.wholeliving.com/136425/buy-or-diy-recycled-crafts#134693

    Got some tired-looking throw pillows and a shirt with a case of ring around the collar?

    MY IDEA was to cut it out and sew it as a SLIP-ON. That way you just unbutton to wash it!!!
    BUT the directions @ bottom would work too, I'm just  gonna' do it MY WAY! HomeMade Is Easy.

    Recycled Craft: Dress-Shirt Pillow


    Got some tired-looking throw pillows and a shirt with a case of ring-around-the-collar? Dress up your bed.
    What You Need
    • Dress shirt
    • Iron
    • Pillow form or batting
    • Pen
    • Needle
    • Thread
    bd0607_summer1.jpg


    1. Place pillow form on an ironed, buttoned shirt. (If using batting, try a pizza pan to get a nice circle.) Trace the shape with a pen and cut the fabric 1/2 inch outside your line.

    2. With the outer panels facing each other, stitch all the way around -- about 1/2 inch inside the fabric edge.

    bd0607_summer1.jpg
    3. Turn right-side out and unbutton to insert your pillow form or stuff with batting, then button back up. Your new pillowcase can be machine washed using the gentle cycle.


    Monday, May 6, 2013

    Bandanna Tablecloth


    Martha Stewart Living Television
    TOOLS AND MATERIALSTape measure
    Prewashed bandannas
    Pins
    Thread
    Sewing pencil
    Scissors
    BANDANNA TABLECLOTH HOW-TO1. Measure your table to determine how many bandannas you'll need (Martha uses fifteen 22-inch squares for a 35-by-71-inch picnic table, with a row of three for the width and a row of five for the length). Pin bandannas, right sides together, to create the width. (Martha doesn't want the existing border around the bandanna to show, so she uses the edge of the pattern as a guide for the pins). Once pinned, the pattern of each bandana should be flush with another.
    2. Machine-sew the bandannas together, then iron the seams flat. Attach the strip of bandannas, pinning them, right sides together, side by side. (Again, Martha uses the edge of the bandanna pattern as a guide.) Machine-sew them together, and iron the seams flat. Repeat process for remaining panels.
    3. Create the hem, using a mitered-corner technique: Fold a double hem, iron, and unfold, making sure the bandanna is topside down and each corner is a 90-degree angle. Fold in half diagonally to make a 45-degree angle and, using a sewing pencil, draw a line perpendicular to the fold. Start from the edge of the pattern closest to the corner, and continue to the first crease of the ironed hemline. Sew along line, then cut off excess fabric beyond the stitch line. Turn inside out, repeat with remaining corners, and sew the hem. 
    **or don't hem.

     good site for bandannas is "orientaltrading.com".