 |
First I took inventory of all of my wrapping paper and ribbons to figure out how many dowels I would need to store all of my stuff. I had 21 rolls of paper (yeah, you can call me a wrapping paper hoarder), and enough ribbon to fill a couple of dowels. I had decided to make two of these since I had the space in our office, but these instructions are just for one, using 14 dowels. |
| Next step is figuring out your shape. Standard wrapping paper rolls are 24 inches, but I had a few that were 30 inches, so I wanted mine to be wider than 30 inches. If I had chose to stick with the 24 inch size, it would not peek from behind the door like you see above. My door is 6 1/2 feet tall, but I opted to keep it at 6 feet tall just so that everything was easily within arms reach. I went to Home Depot and bought two 2x2x8 boards, and had them cut them to be 6 feet tall. Home Depot will cut them for free, so it saves me the work! I picked up 14 dowels that were their 7/16 x 48" size (labeled green or "jade"). I chose this size because any smaller and the dowels would sag with heavy rolls of paper on them. Any larger and some of the rolls of ribbon I have wouldn't fit on them. Plus, this size fits perfectly with the standard 1" hook size, thus keeping the costs way down. Attach your newly cut 2x2 boards behind the door. I used #10 x 3-1/2" wood screws (3 on each side: 6 total). I pre-drilled holes in the wood and the wall to make it easier. |
 |
| Here are the hooks you want. You'll need to figure out how many dowels you're going to use to determine how many to get. Since I was making two of these it made more sense to buy a box of 50 to start with. These are nice because when you screw them in, you don't need to pre-drill. I measured mine to be 5 inches apart, but you can probably put them a little closer in order to get more dowels in. Screw all of the hooks in to both boards. |
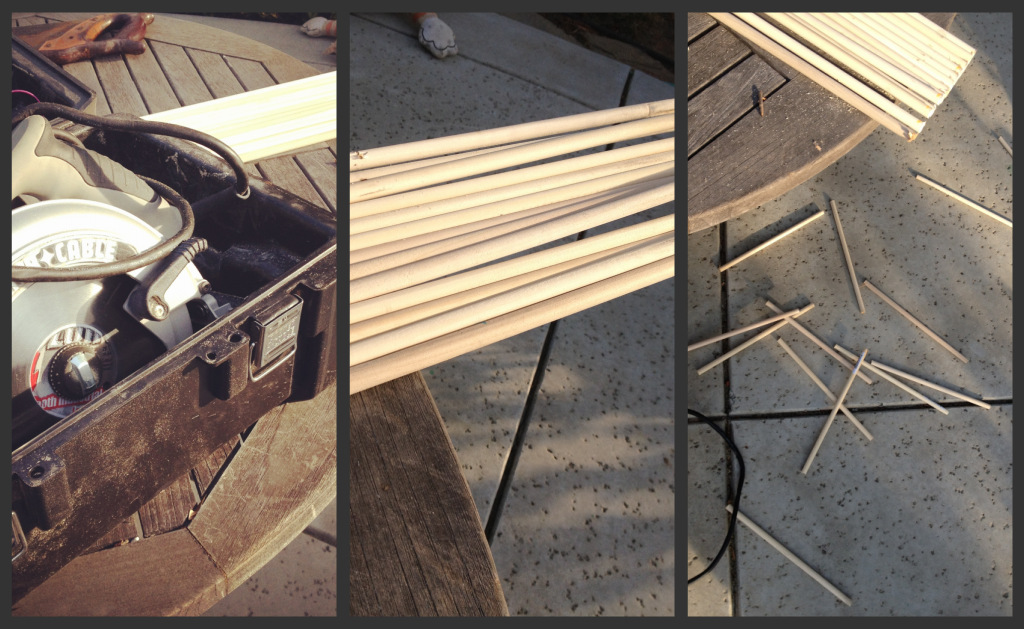 |
| Next up is cutting the dowels. I admit I didn't measure here. I just placed one of the dowels in the hooks on the wall and marked where I wanted to cut it, where it was overlapping the hooks by about a half an inch. I then marked the rest of my dowels at the same location, took them outside, and cut them all with a circular saw. This can be done with a hand saw as well, but go with a circular saw for a cleaner, faster cut. |
 |
| Last step is to load up the rack with your rolls of wrapping paper and ribbon. I paper clip one side of each roll to keep them neat on the rack. |
 |
| Ta-da! All done! This was done for a little over $30. Here's the cost breakdown with items being purchased at Home Depot: 7/16 x 48" dowels: $1.47 each (I used 14 here) 2x2 8 foot boards: $1.48 each (used 2) #10 x 3-1/2" wood screws $0.98 for pkg of 2 (need 3 pkgs) Box of 50 hooks: $4.21 POSTED JANUARY 2012 http://readbetweenthelimes.blogspot.com/2012/01/diy-behind-door-wrapping-paperribbon.html |


