I did this project few years ago. This site did a much better job. I do note that since the last project on this site the #10 can is used to melt the beeswax. Something I have always done. I don't like to have to clean up pans. I use candle supplies ONLY for making candles. For holding wick in place. My grandma taught me to use a clothespin. IT does work. Enjoy....
A good, 100% natural, chemical-free beeswax is the highest quality wax
you can get, burning brighter and hotter for longer than other waxes.
All good qualities in a survival candle.
Beeswax is more expensive than the soy wax that we used on the survival
candles--around three to five times the cost, I've found. It can be
purchased on
Amazon and
elsewhere online - look for 100% beeswax, organic, filtered, cosmetic
grade and collected from bees who aren't exposed to pesticides. The wax
itself will be a shade of yellow/orange and smell like honey--very
pleasant, but doesn't mix well with other scents. If you have a local
beekeeper, they might also be a good source to develop.
Because of its expense, beeswax is probably best when you really need to
maximize your candle horsepower in a given size/weight package. If
you're only going to have a few tealights or a small candle and want the
best performance--as in most survival kits--beeswax is your ticket. If
the size/weight to performance ratio isn't as important, I'd stick with
another wax. As an example, most tea lights will burn around 3-4 hours,
and a good beeswax tea light will burn 5 to 6 hours. Beeswax tea lights
sell for around $1 a pop.
Beeswax also has a high melting point of 144 to 147 degrees, so if you
want to leave a candle in a vehicle, beeswax is your best bet.
To make beeswax candles, the procedures are similar. Beeswax has a
higher melt point, cools/hardens remarkably fast, and is a lot harder
than soy wax, which means it's a heck of a lot harder to clean up--don't
use your good cookware here!
All safety precautions apply here -
make candles at your own risk! You're working with hot wax and fire, so
bad things can certainly happen.
Supplies Needed:
- Beeswax
- Wicks - square braid cotton wicks are traditionally used for
beeswax candles. I'm using some random wicks that I have on hand--I
think they're zinc cored--and they work, but they're not optimal. For a
tea light sized beeswax candles, I've heard #4/0 square braid wicks recommended; you may want to play around with different wick sizes to get the best performance. That's on my to-do list.
- Container - I'm using plundered tealight cups and an altoid tin. Make sure it's not going to explode from heat/burst into flames.
- Wick tabs
Tools Needed:
- Melting pot/container - unlike soy wax, beeswax is very difficult to
clean up, so use something you don't mind getting semi-permanently
beeswaxed.
- Scissors for trimming the wick
- Gloves, hot pads, multitool - whatever you need for handling the hot container during pouring
Melt the Wax
I melt the wax in a double boiler, and use a double boiler as a safety
precaution - beeswax has a flashpoint of almost 400 degrees, so it's
probably not going to ignite on you if you keep an eye on it. I used an
old can for melting, poured directly from the can
into the containers and then chucked the can afterwards. Not fancy, but
it works.
 |
| Beeswax melting in improvised double boiler. |
You can also just use the ol' microwave to melt the wax--using a
microwaveable container, take your time and keep an eye on it. I haven't
tried the microwave method yet, so I can't give specific guidance
there.
Again, beeswax is difficult to clean up. Dedicated candle making supplies are probably a good idea if
you're going to be making 'em regularly.
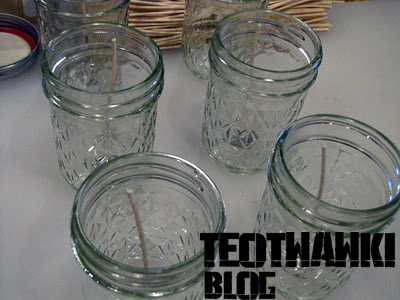
Prep the Wicks and Containers
Get your wicks and containers ready for wax pouring. Thread the wicks
through the tabs and trim to a rough length of where you wan them to
be--I usually leave a bit extra at this point and come back and do a
final trim later. Place the wick tabs into whatever container you're
going to use--here I'm using aluminum tea light cups. These were
salvaged from a stash of paraffin tea lights, but you can also purchase
the
tea light cups online from Amazon and other sellers.
Depending on the wick you're using, you may also need to "prime" the
wick, which is basically tossing a length of the wick into your melted
wax. You should see some air bubbles rise to the surface. Let the wick
sit, submerged in the wax for about two to three minutes, then pull it
out, drip the excess wax back into your melt pot and set the wick aside
to cool. Make sure to straighten the wick at this point, as it will be
hard and un-bendy after the wax has cooled.
The altoid tin was a bit of an unscientific experiment. I cleaned out the altoid tin and lined up 3 wick/tabs.
Pour Melt Wax into Containers
Be careful pouring, the wax will very hot! After pouring, you may need
to straighten your wicks carefully. Beeswax starts firming up quickly,
so don't dilly-dally if the wicks need major correcting.
 |
| After pouring. You can see the wicks I'm using are a bit on the fat side. |
Let Wax Cool & Trim Wicks
Let the wax cool for a couple hours, though beeswax hardens up much
faster than the soy waxes I've worked with. You'll also want to do a
final trim of the wicks, getting them to around 1/4 an inch above your
wax.
 |
| Altoid tin candle cooling, prior to final trimming. |
There you go! Very simple process. Unlike soy wax, beeswax is tough
enough to use in pillar and votive candles - I haven't experimented
there, but will probably give it a go in the near future.
As mentioned, beeswax is on the spendy side, but it is all natural good
stuff, and should give you better burn times for a given size of candle.
The altoid tin experiment turned out pretty well; the candle kicks off a
good amount of light and some heat, and the lid of the tin can be used
as a reflector. Haven't done a full burn time test yet, but like any
multi-wick candle, you can extend the life by lighting one wick at a
time. With the high melt point of beeswax, could be a good addition to a
car kit.
Have fun, experiment a bit and be careful!
EDIT: Thanks to all of the Pinners who have helped share these instructions. Please do not copy/paste this to your website and claim it for your own. Give credit where it is due.


