
Credit: Photo courtesy of Lauren Davison
http://www.hgtv.com/decorating-basics/clever-uses-for-everyday-items-in-the-kitchen/pictures/index.html
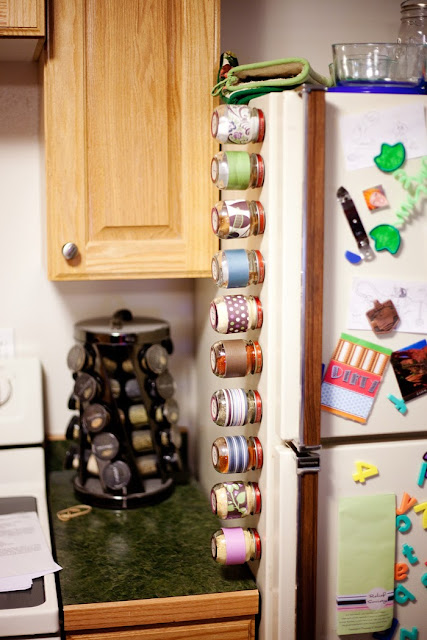
Magnetic Spices at Hand
From parsley to cinnamon, it's easy for spices to take over your cupboards. To fix this problem, Lauren Davison
repurposed baby food jars and turned them into magnetic spice jars that
easily attach to the side of the refrigerator. "They're a great way to
keep clutter out of your cupboards, save time while cooking and add a
touch of personality to the kitchen," she says. "Plus, it's easy to find
the spice you need and see when you're getting low." Want to make your
own? See Lauren's full tutorial.
I still have some spices left in my cupboard, but I ran out of magnets, so I was only able to make 10 jars.
These took a bit of time, but very little skill.
Obviously.
I just collected baby food jars, rinsed them out, and pulled off as much
of the label that I could. Then I popped them in the dishwasher (the
lids, too). I didn't worry about the sticky spot left over since it
would be covered by the paper/cardstock I wrapped around the jar.
I had some nice powerful magnets. I got mine from some store on ebay.
To eliminate any need to coordinate colors on my part, I used the DCWV Latte Mat Stack, with its coordinating solid mat stack
to decorate the jars. I had bought them a long time ago when I was on
my paper kick. It was fun to be able to use them for something besides
eye candy!
I Mod Podged
1" strips of paper around the jar. The Mat Stacks I had were 8x8, and I
found that a 1"x 8" strip is the perfect size to wrap around standard
baby food jars. I Mod Podged them to the jars, and then covered the
strip in Mod Podge, too, to give it a nice finished sheen and to make
sure the end of the strip wouldn't ever start peeling up.
I made the labels out of two circular pieces of paper. I used a half
dollar for my big circles, and a quarter for the cream colored circles.
Hi-tech, I know. I wrote the names of the spices on the cream circles
and let them dry for a bit, just to ensure they wouldn't bleed at all
when I put Mod Podge over the top. I the glued the big circle to the
bottom and let it dry a bit. Then I covered it in Mod Podge and put the
cream circle on it, let it dry, and then covered the whole thing in Mod
Podge again.
Now for the magnets. The ones I had were smaller, so I used two on each
jar. Kirby is a genius and pointed out that if I just hot glued the
magnets straight to the lid, they might not end up being level, which
would make the magnetic bond with the fridge weaker, and could even
cause the magnets to pull free from the lid. So we got out an old card
table and I stuck the magnets to it, put hot glue blobs on those, and
actually set the lid (with the jar attached) on top of the magnets. That
way, when the glue hardened, the magnets would be perfectly even.
Worked like a charm. That wouldn't be an issue if you had magnets with a
nice big radius, though. I reinforced the magnet by putting a ring of
hot glue around the edge of the magnet.
Whew! That's quite an explanation for a project that requires little skill!
So far I am loving it. It's SO easy to find the spices I need. No more
rummaging around like a mad woman. Plus--my fridge is right next to our
stove, so it is the most convenient spot to keep them!
No comments:
Post a Comment